Arduino With PIR Sensor for motion detector TECHATRONICS
import digitalio. Then create a simple digital input for the PIR. Remember to use the right board pin for how you've wired your sensor to your board. This example is using pin D2 on a Trinket M0: Download File. Copy Code. pir = digitalio.DigitalInOut(board.D2) pir.direction = digitalio.Direction.INPUT.

PIR SENSOR Arduino nano PIR SENSOR Tutorial [Code and Circuit Diagram] YouTube
PIR sensor: Never keep PIR Sensor close to the Wi-Fi antenna, ESP32, or NodeMCU. PIR (Passive Infrared) sensor close to a WiFi antenna impacts the sensor's performance. PIR sensors detect changes in infrared radiation for motion detection. WiFi signals emit electromagnetic radiation that can interfere with the PIR sensor. Which causes false.
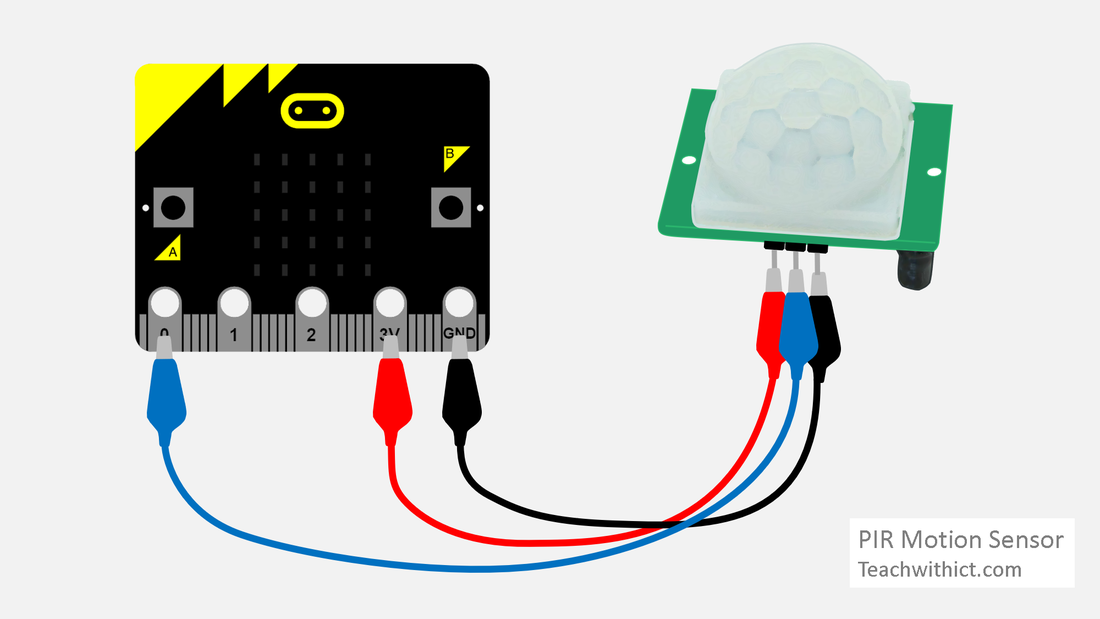
How to attach a PIR motion sensor to a microbit
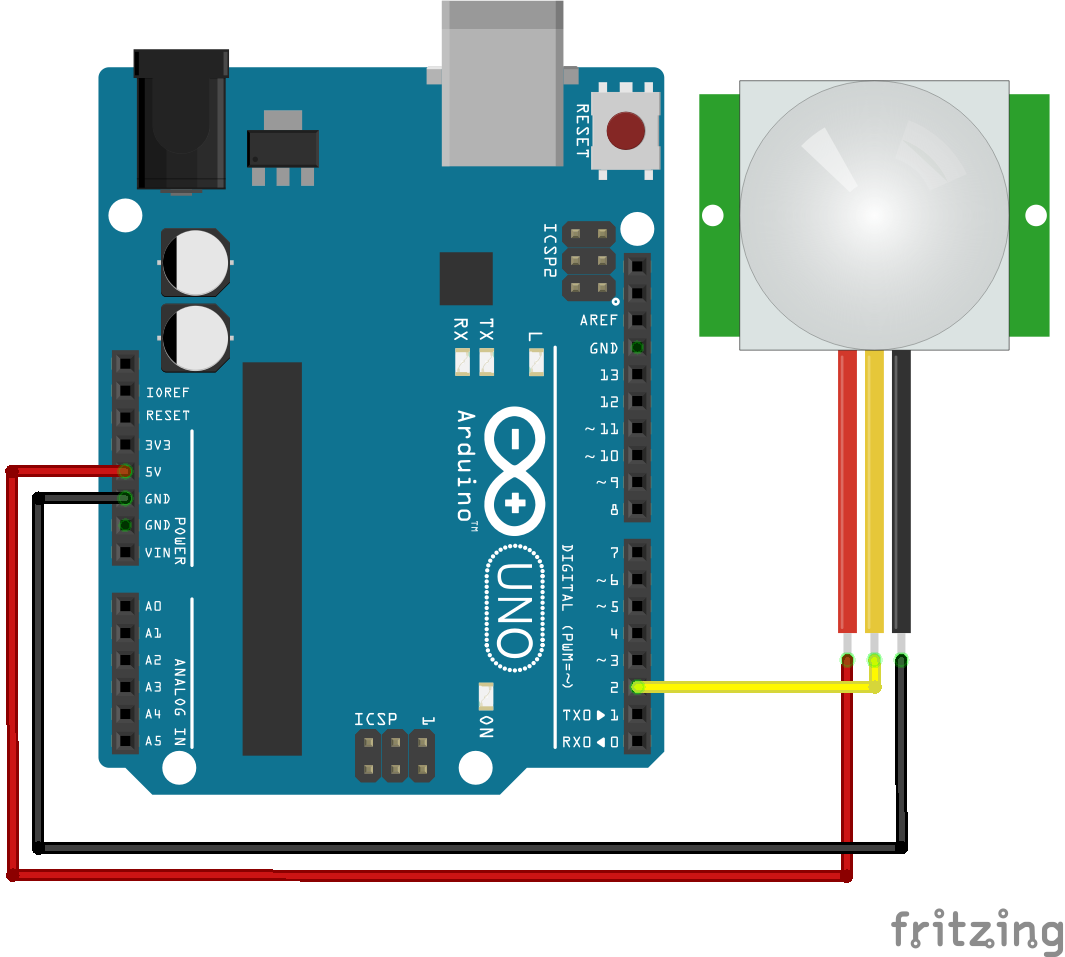
Arduino PIR Motion Sensor Interfacing Circuit Diagram. Connect the PIR sensor's VCC (or +) pin to the Arduino's 5V output. Connect the GND (-) pin of the PIR sensor to any GND pin on the Arduino. Attach the OUT (or signal) pin of the PIR sensor module to a digital input pin on the Arduino (e.g., pin 5).

How to use PIR Motion Sensor with Arduino Ardumotive Arduino Greek Playground
Introducing the PIR Motion Sensor. The PIR motion sensor is ideal to detect movement. PIR stand for "Passive Infrared". Basically, the PIR motion sensor measures infrared light from objects in its field of view. So, it can detect motion based on changes in infrared light in the environment.
PIR sensor HCSR501 Arduino code and circuit
print(PIR_sensor.value()) If the sensor's state is 0, that means motion is detected by the sensor and we turn on the LED for 5 seconds. The shell terminal will print the message: Motion Detected! -> LED is now ON. If the sensor's state is 1, that means motion is not detected by the sensor, so the LED remains OFF.
Learn Coding with Arduino IDE PIR Motion Sensor «
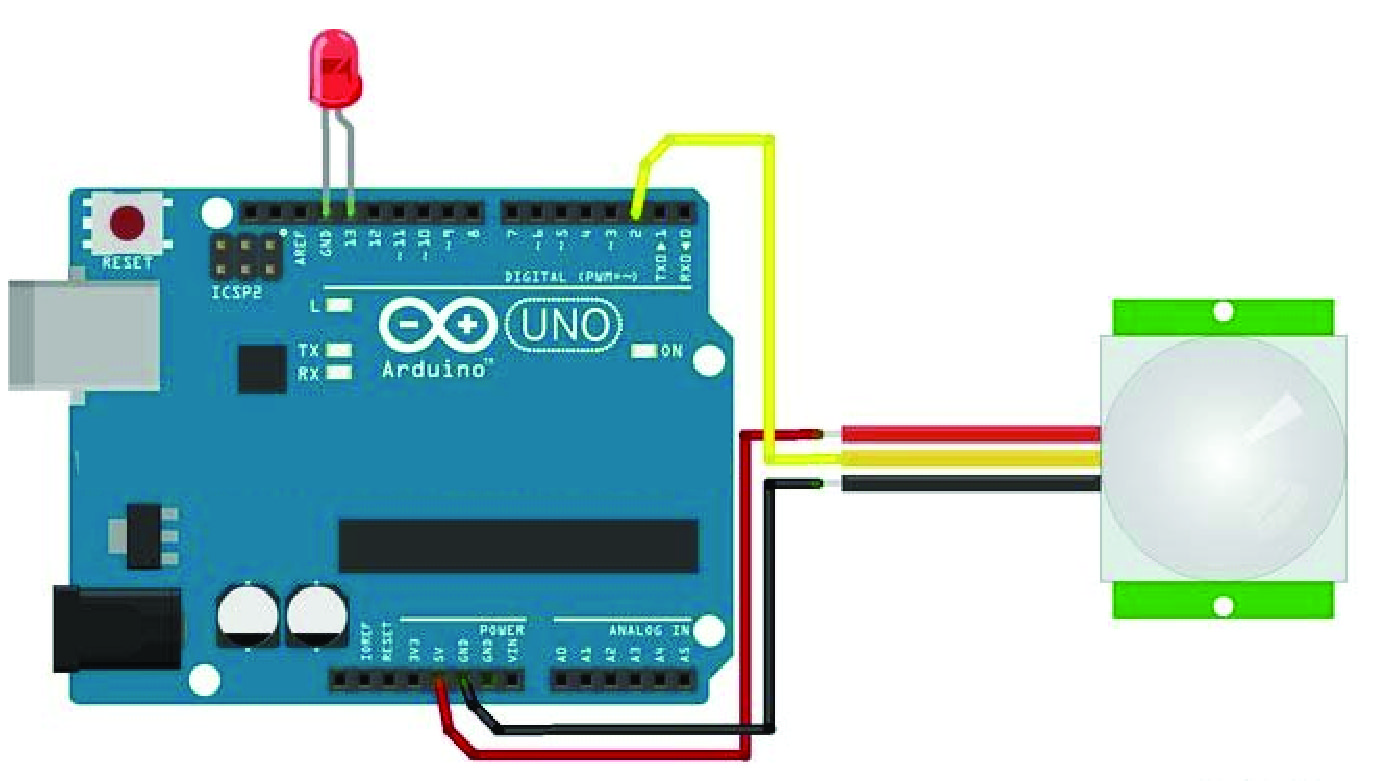
HC-SR501 PIR motion sensor with Arduino UNO example code. With the following example code, you can read out the sensor and control the on-board LED of the Arduino (connected to pin 13). This code can also be used to control simple relays to turn a bigger light on or off. You can upload the example code with the Arduino IDE.

ESP32CAM with PIR motion sensor PLUS Telegram? Arduino Project Hub
Important: the Mini AM312 PIR Motion Sensor used in this project operates at 3.3V. However, if you're using another PIR motion sensor like the HC-SR501, it operates at 5V. You can either modify it to operate at 3.3V or simply power it using the Vin pin. The following figure shows the AM312 PIR motion sensor pinout. Uploading the Code
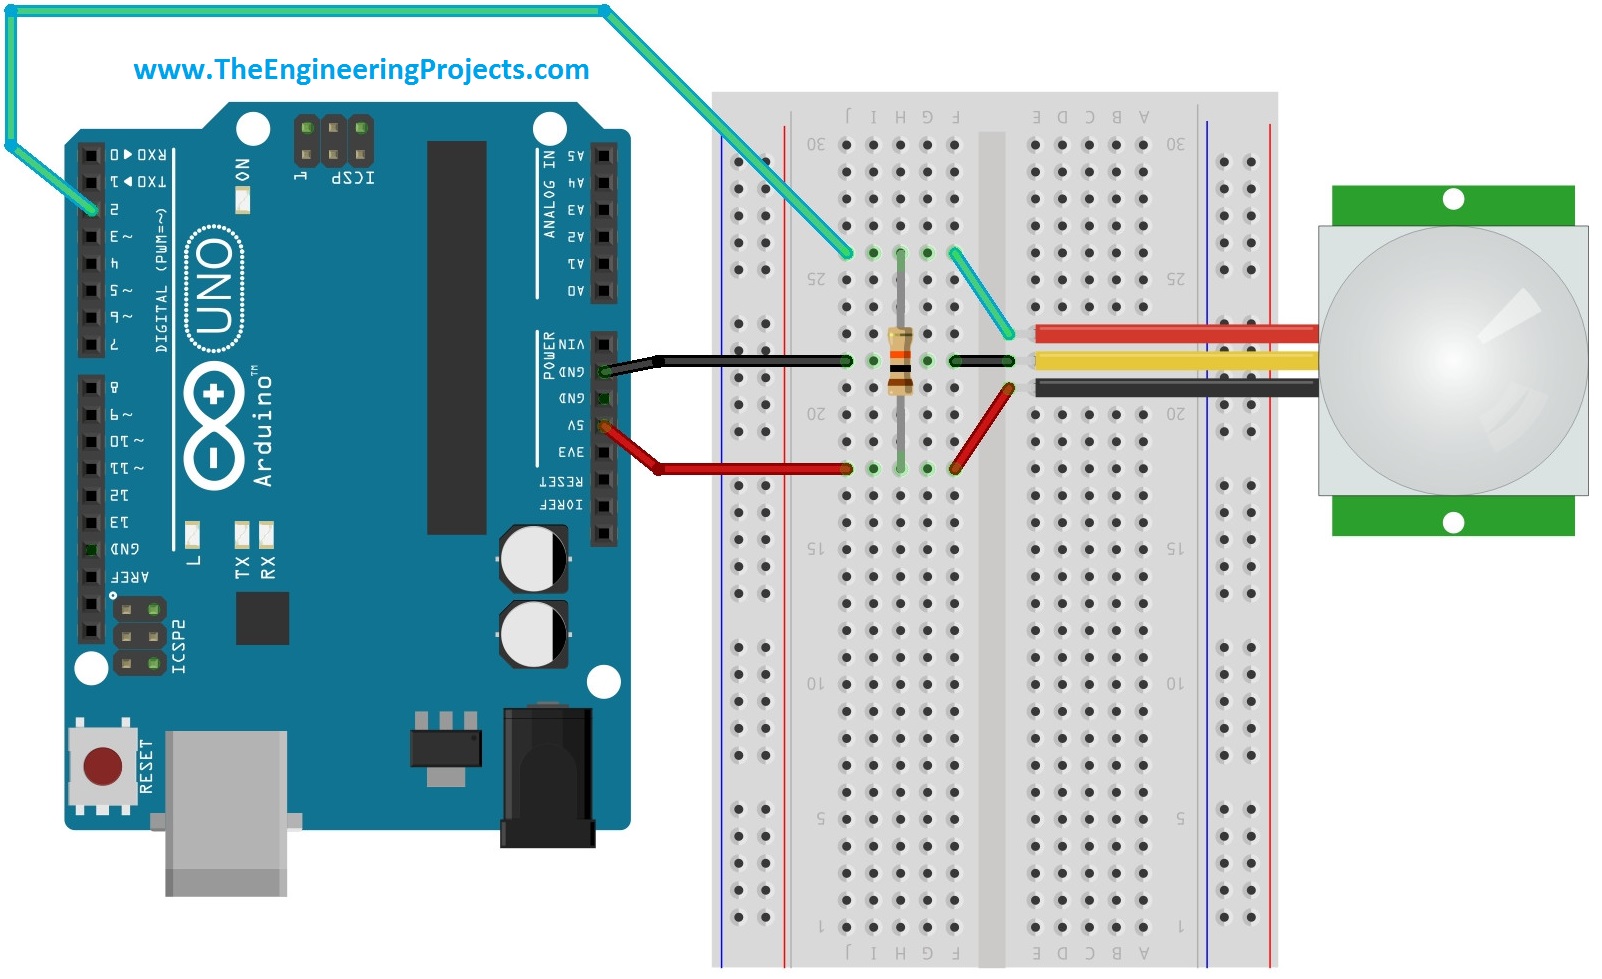
Interfacing PIR sensor with Arduino The Engineering Projects
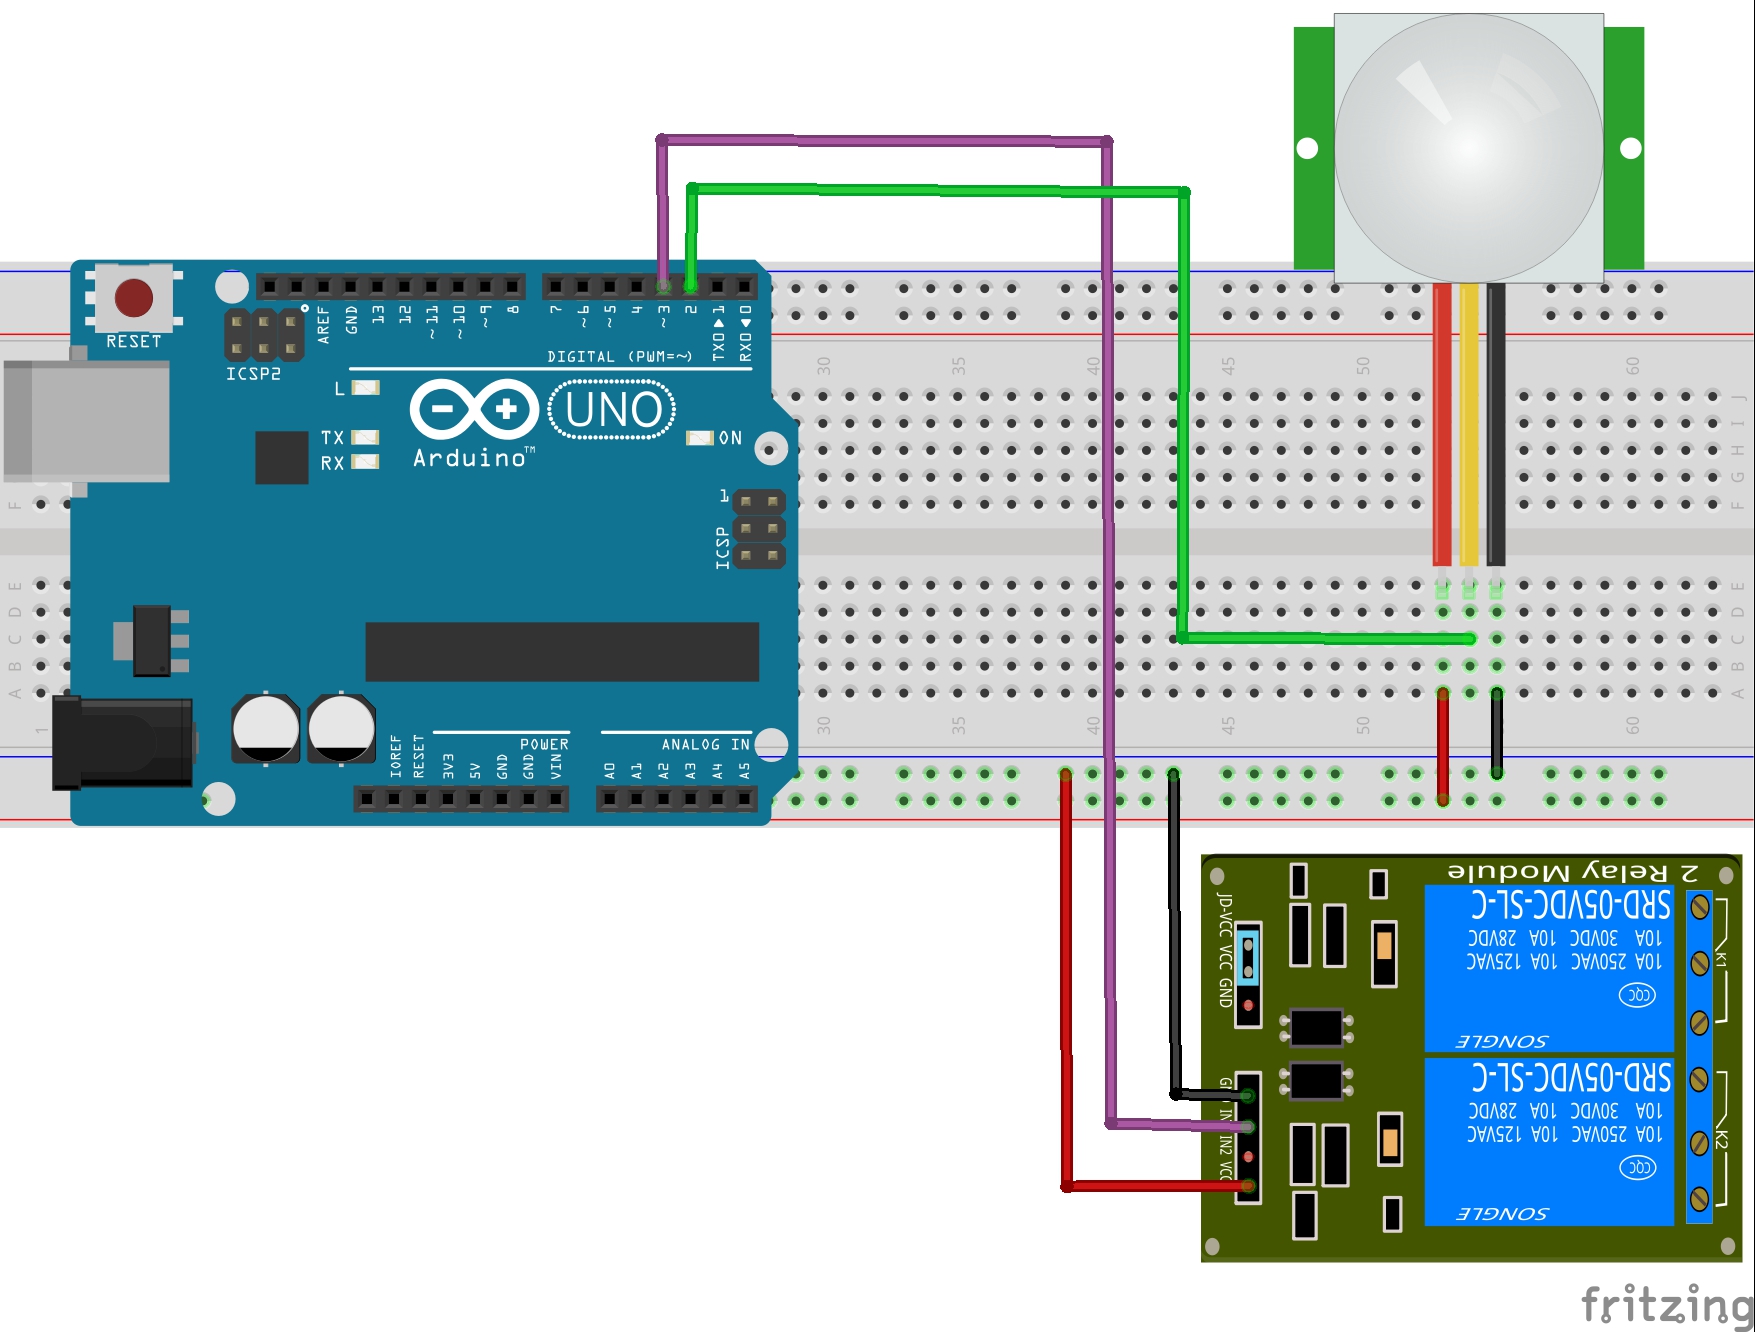
Here's the Arduino Code for this example. It's quite simple. We just need to define the PIR Sensor pin as input and the relay pin as output. Using the digitalRead () function we will read the output of the sensor and if its high or if an object is detected it will activate the relay.

How to Use PIR Sensor module with Arduino Arduino Project Hub
The PIR Sensor. The IR sensor itself is housed in a hermetically sealed metal can to improve noise/temperature/humidity immunity. There is a window made of IR-transmissive material (typically coated silicon since that is very easy to come by) that protects the sensing element. Behind the window are the two balanced sensors.

How to Interface PIR Motion Sensor with Arduino UNO
For most of our Arduino projects that require detecting whether someone has left or entered the area, the HC-SR501 PIR sensor is a great choice. It is low power, low cost, easy to interface and extremely popular among hobbyists. This PIR sensor itself is pretty straightforward and works out of the box. Simply apply power 5V - 12V and ground.

How PIR Sensor Works and How to use PIR motion sensor with Arduino YouTube
Power the PIR with 5V and connect ground to ground. Then connect the output to a digital pin. In this example we'll use pin 2. The code is very simple, and is basically just keeps track of whether the input to pin 2 is high or low. It also tracks the state of the pin, so that it prints out a message when motion has started and stopped.

Interface a PIR Sensor with Arduino Uno ProteShea
Interfacing the PIR Motion Sensor to the Raspberry Pi's Input GPIO. Read Now, we can try reading the output from the PIR motion sensor. The sensor outputs a digital HIGH (5V) signal when it detects a person. Copy and paste the following code into your Raspberry Pi and save it as a Python file: pirtest.py:

PIR Motion Sensor With Arduino in Tinkercad 7 Steps (with Pictures)
1) To detect motion using a PIR motion sensor with the Raspberry Pi, you can use the MotionSensor interface of the gpiozero library. You need to import it first like this: from gpiozero import MotionSensor. 2) Define the GPIO that the motion sensor is connected to: pir = MotionSensor(GPIO_NUMBER_OF_YOUR_CHOICE)
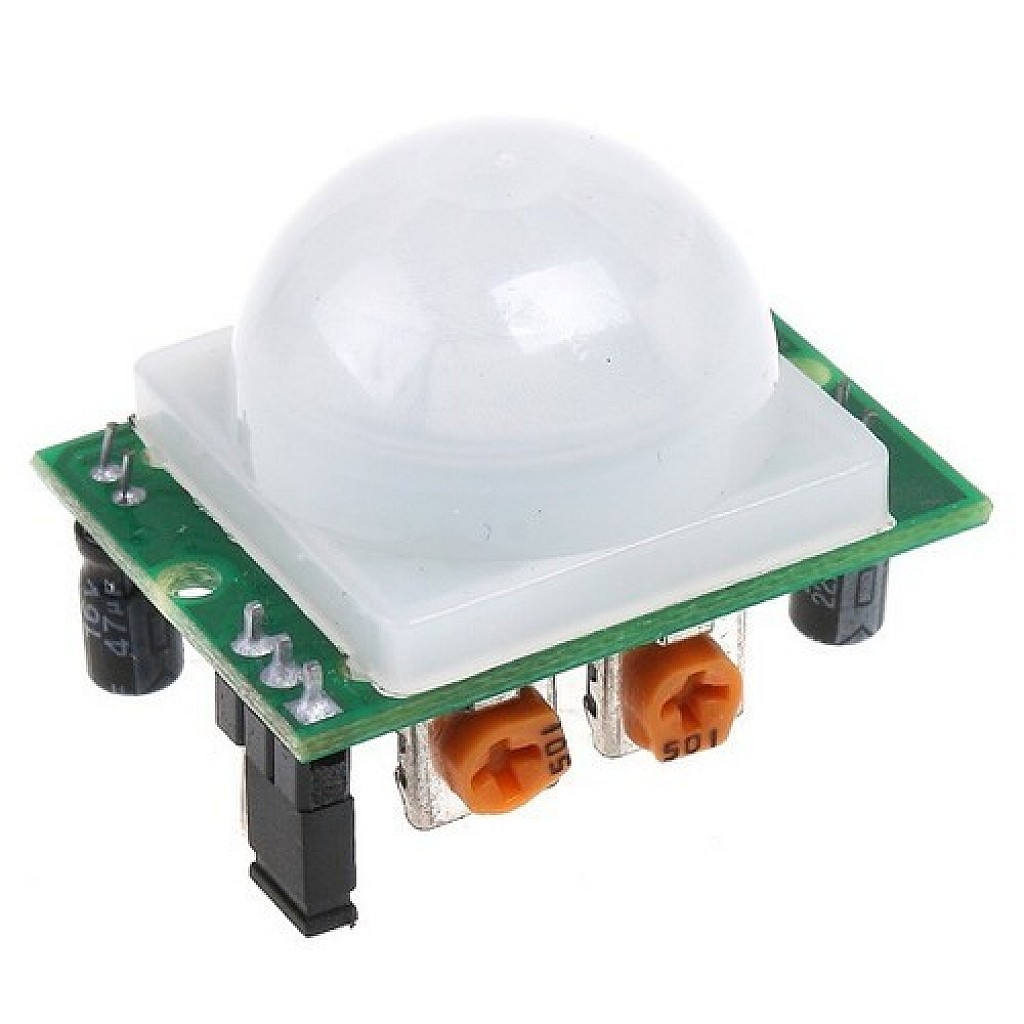
PIR Motion Detector Sensor Module
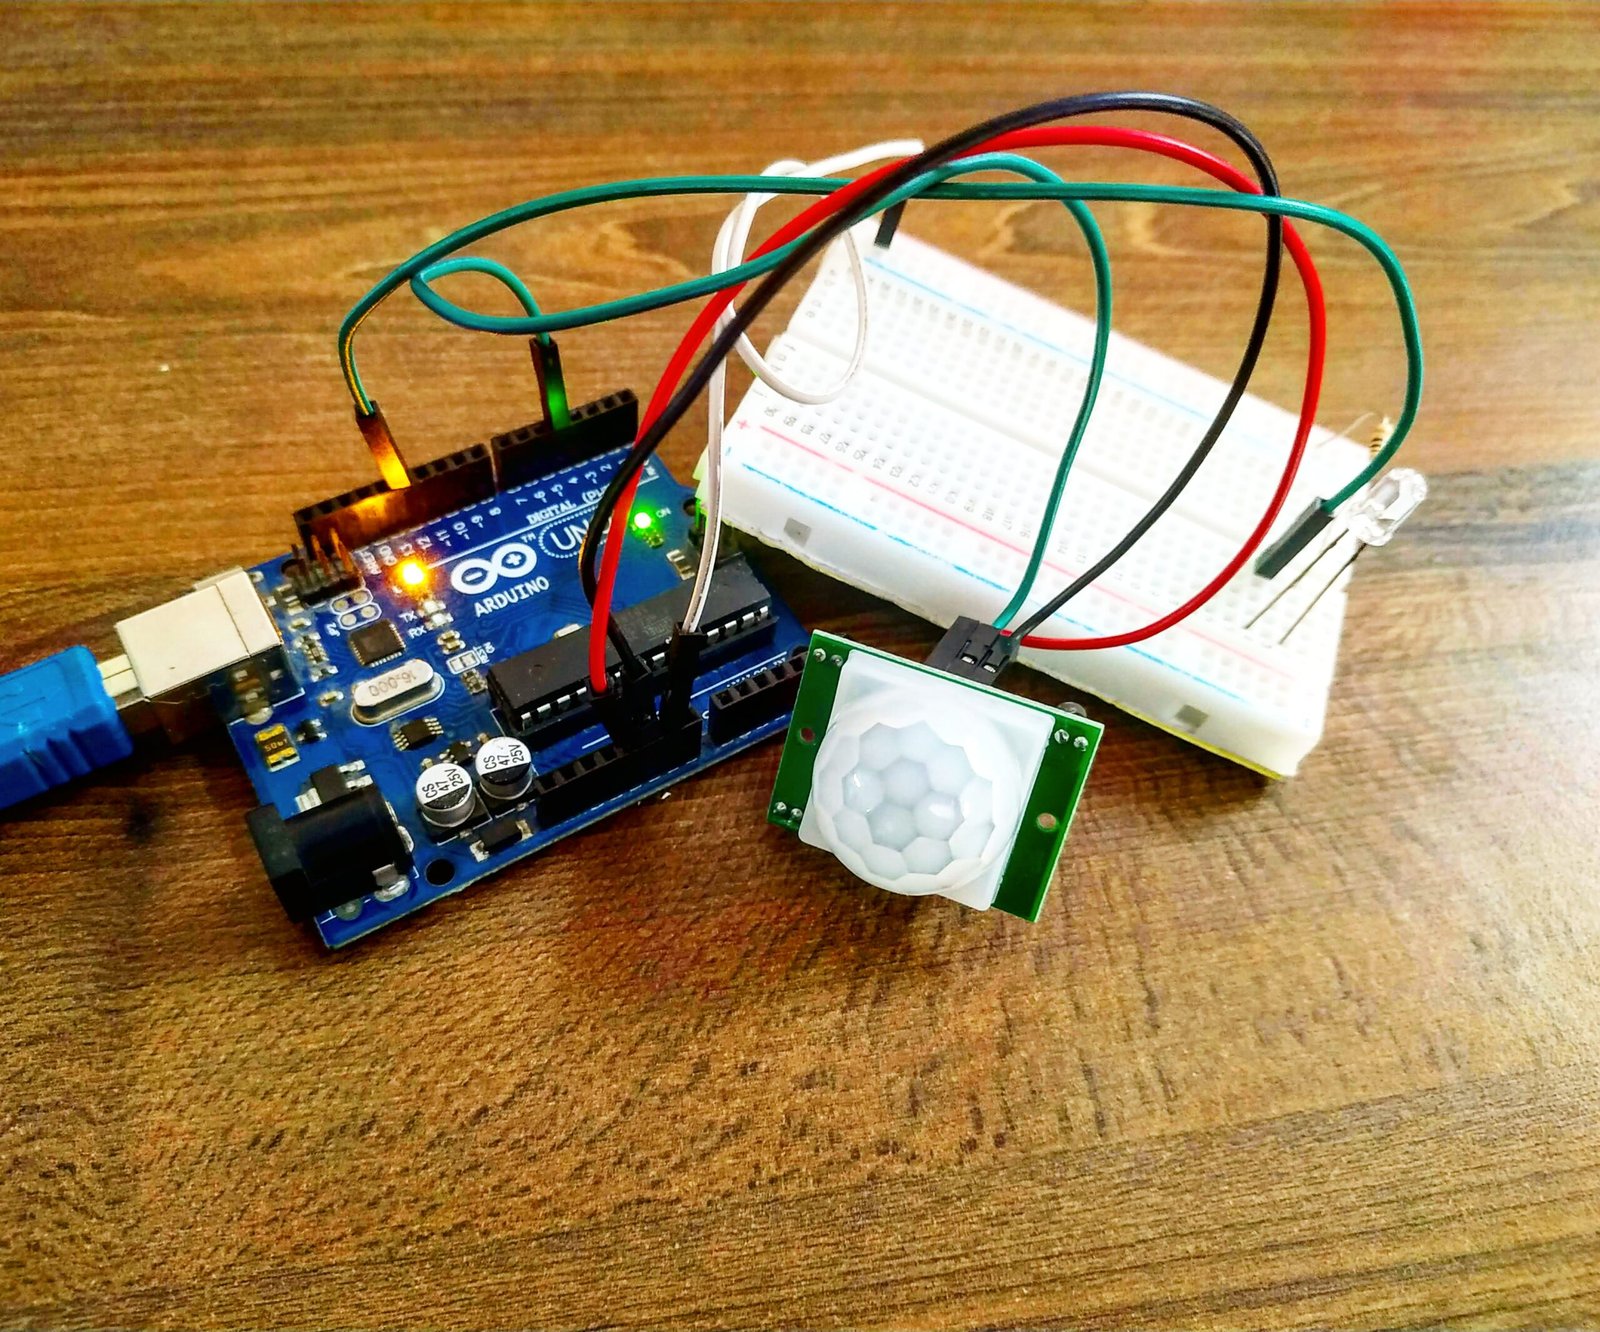
The PIR sensor has three pins. The middle pin is used to receive the signal. The other pins are used to power the sensor. The PIR sensor emits digital signals. Gives a digital value of 1 when a movement occurs and 0 when it does not. Okay, let's do the project step by step using the PIR sensor. The required components are as follows.

PIR Motion Sensor With Arduino in Tinkercad 7 Steps (with Pictures) Instructables
Both the sensors sit beside each other, and when a motion is detected or the signal differential between the two sensors changes the PIR motion sensor will return a LOW result (logic zero volts). It means that you must wait for the pin to go low in the code. When the pin goes low, the desired function can be called. Fig. 2 PIR Motion Sensor.
Working on PIR Motion Sensor with Arudino
PIR Sensor with ESP8266 Arduino IoT Cloud: PIR Sensor with ESP8266 Nodemcu and Arduino IoT Cloud- In this tutorial, we will use PIR sensor with ESP8266 through Arduino IoT cloud to control the light through a relay. When a person or animal will move in front of the sensor a notification will be sent to the Arduino IoT Cloud or Arduino IoT App and the light will turn on and when there is.