Cara Setting dan Rendering Filmora Mudah dan Cepat. Fast Rendering Filmora. Buktikan!! YouTube
In this video, we go through using the timeline in Filmora0:23 - Moving Around Timeline1:00 - Tracks2:10 - Track Manager3:12 - Markers Learn how to edit.

Filmora 9 render button zoomhomepage
This lesson of our Filmora tutorial is dedicated to the Render Button that will ensure the smooth playback of video files and visual effects, you add to the timeline.. Rendering Previews from Filmora's Timeline. The playback of high-resolution video files can lag sometimes if the computer used for editing those files doesn't have enough processing power.
Gerenciar Linha do Tempo no Filmora para Mac
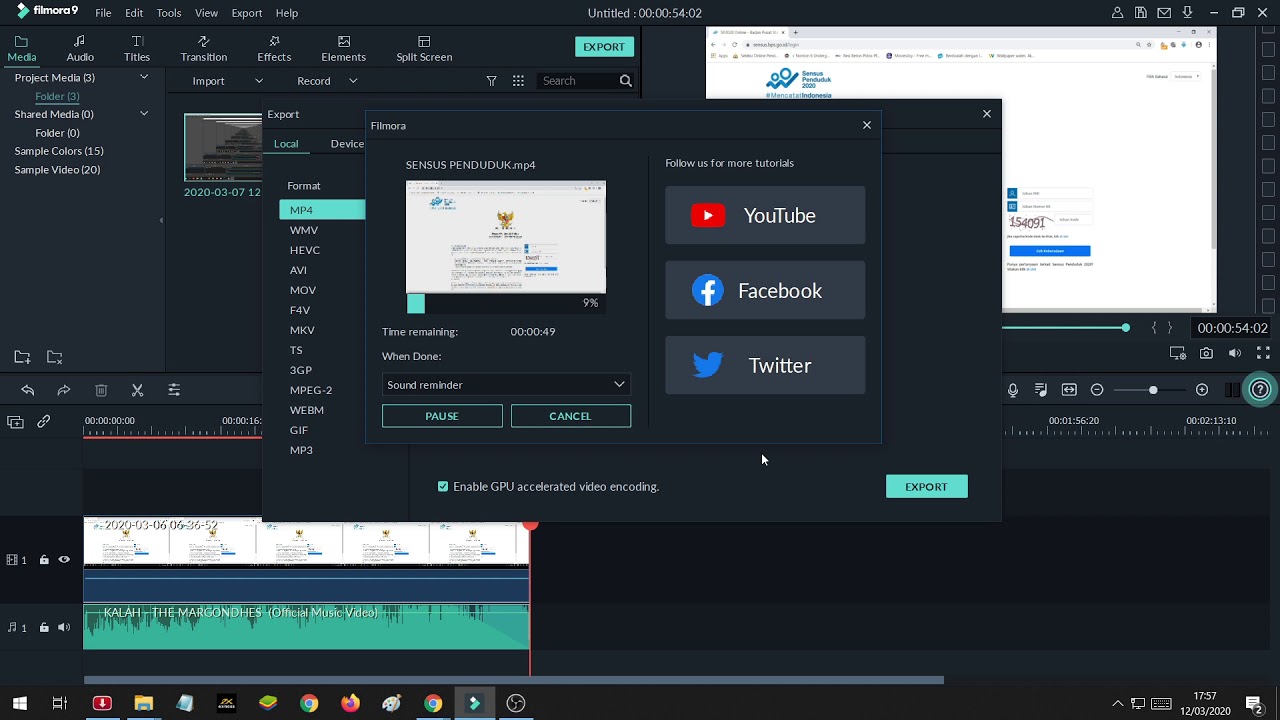
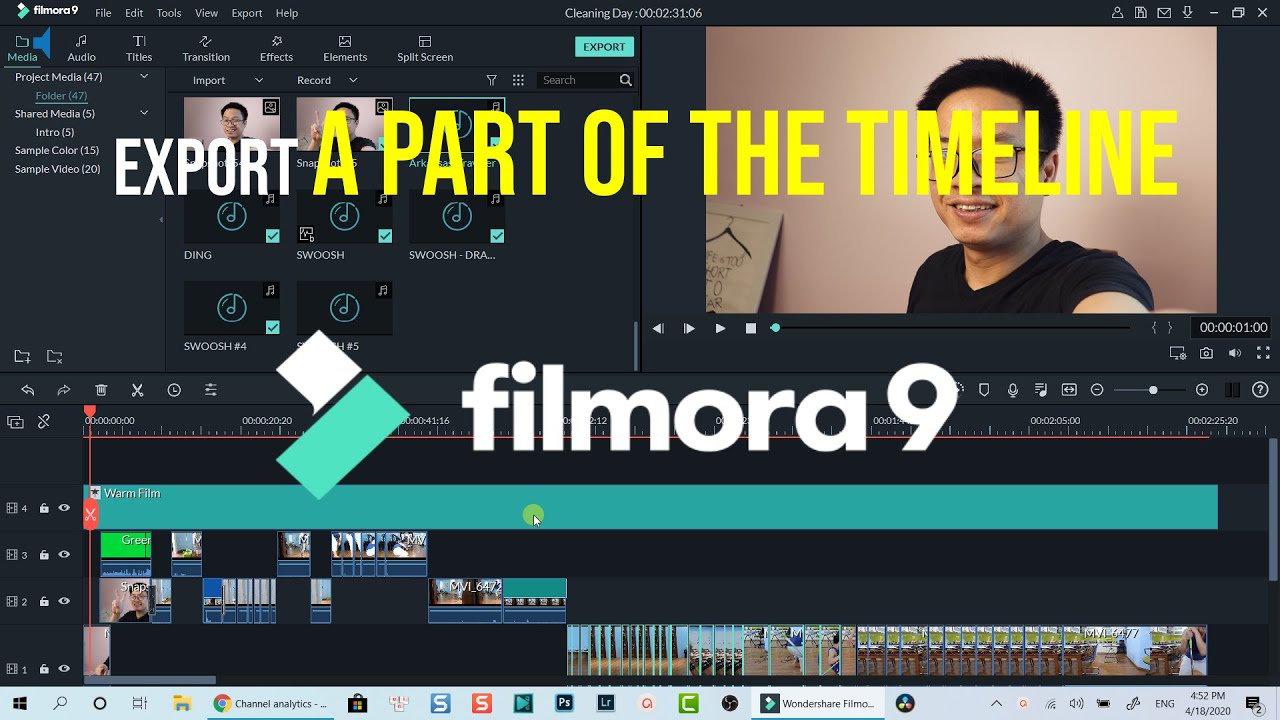
In the Tutorial #35 video, we will show you How to Export a Part of Timeline in Wondershare Filmora.Exporting Individual ClipsTo export an individual clip, r.

How to Best render For Filmora 9 Shawon Offical Filmora 9 . YouTube
Filmora menawarkan 2 cara untuk merender pratinjau timeline Anda: Render Manual (Tombol Render) Klik Tombol Render untuk mulai merender timeline Anda setiap kali garis merah muncul (seperti saat Anda menambahkan media atau membuat perubahan lain pada timeline Anda). Jendela pratinjau render yang menampilkan progres render dan perkiraan waktu.

Wondershare Filmora 9 How to Fix Lag Render Timeline Easily 2 Methods 2019 YouTube
The timeline in Filmora has a very user friendly and lucid layout. It makes the video editing, piling and combination quite easy and very flexible. By learning this lesson, you will learn what is timeline in Filmora and how can you manage it.. Render and Playback. 13:51. Working With Proxies. 11:53. Preferences for Better Performance. 19:14.

FILMORA 9.2 RENDER PLAY BACK FILMORA9 RENDER BUTTON YouTube
Once the rendering process is completed, the red line displayed over the media files will turn teal. Under its default settings, Filmora9 doesn't automatically render all files you add to the timeline, so all video clips or visual effects you placed on the timeline after the rendering process is completed have to be rendered separately.

Timeline Filmora 9 YouTube
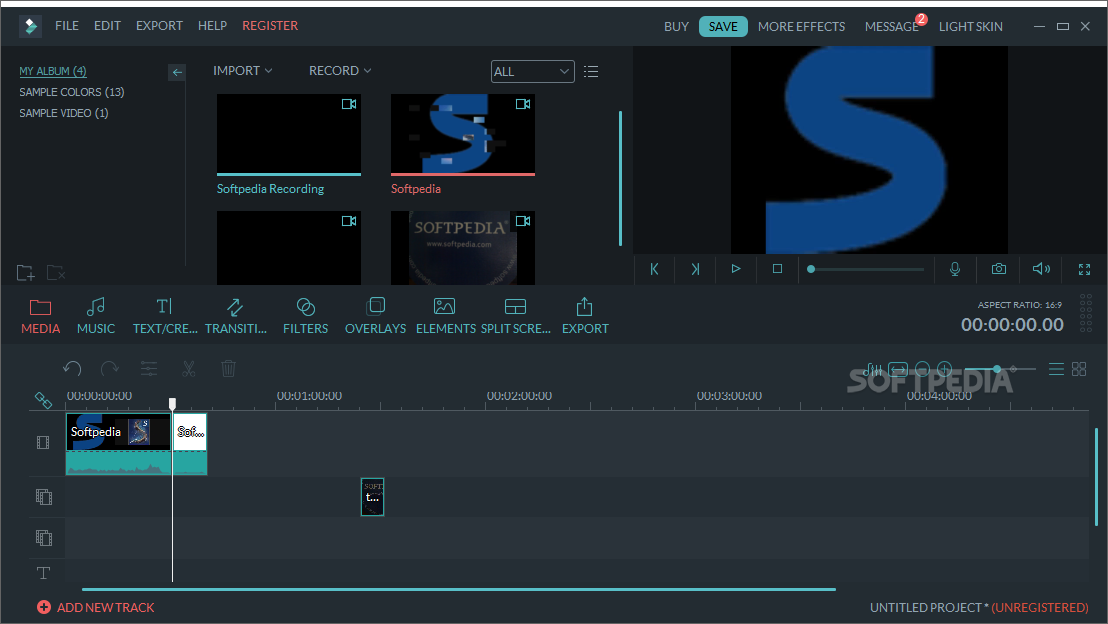
Ep. 07 Menggunakan & Menyesuaikan Timeline. By Liza Brown - Jul 04, 2023 14:15 PM. Timeline merupakan tempat untuk sebagian besar proses pengeditan video berlangsung. Dalam tutorial berikut ini, kita akan mempelajari cara menambahkan, menyesuaikan, mengunci, dan menyembunyikan trek video dan audio pada panel timeline di aplikasi Filmora9.
Export a PART of the TIMELINE Filmora 9 Tutorial YouTube
Filmora offers 2 ways to render your timeline preview: Manual Render (The Render Button) Click the Render Button to begin rendering your timeline whenever this red line appears (as when you add media or make other changes to your timeline). The render preview window will pop up, showing the render progress and the estimated remaining time. Once.

CARA RENDER VIDEO DI FILMORA 9 YouTube
Click the Render Button to begin rendering your timeline whenever this red line appears (as when you add media or make other changes to your timeline). The render preview window will pop up, showing the render progress and the estimated remaining time. Once the rendering is complete, the red line will turn green. Note: you will need to wait.
Utilisation de la timeline dans Filmora [Tuto vidéo]
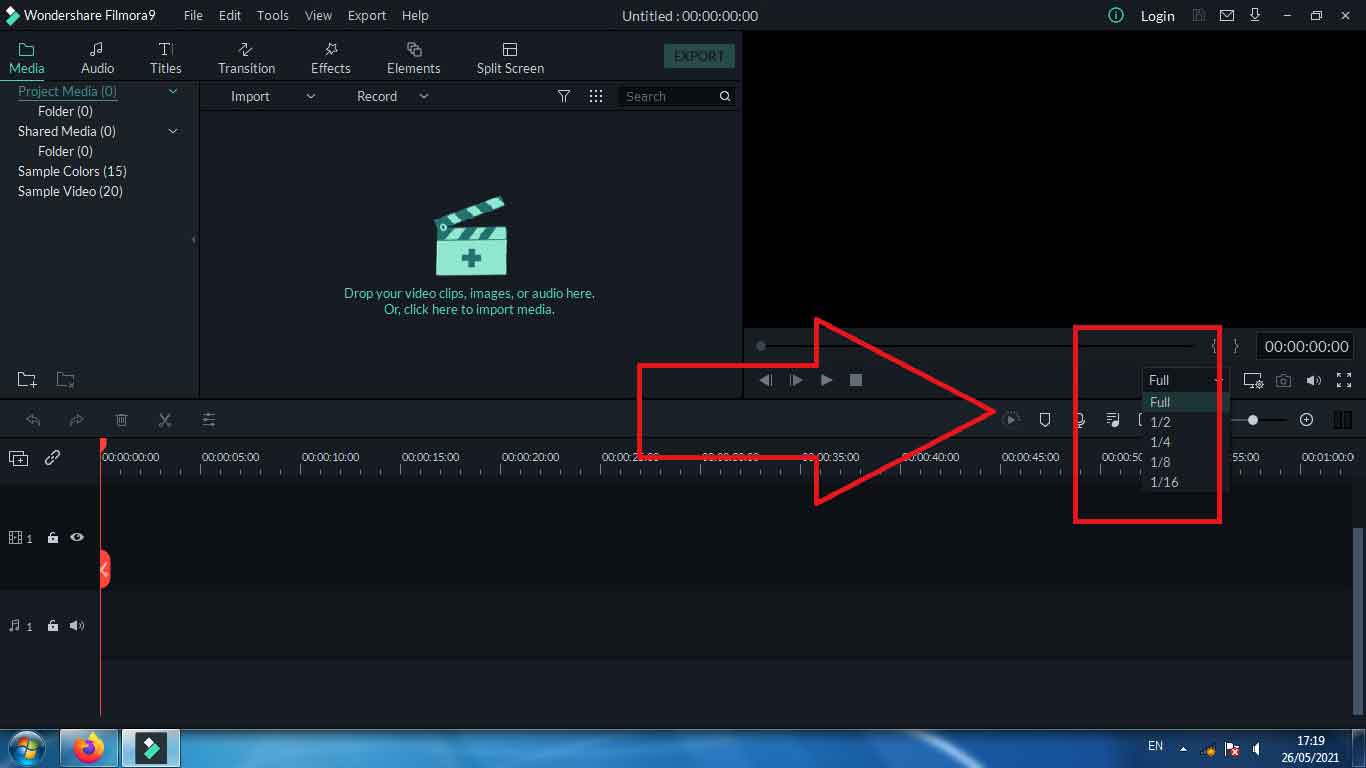
Move the mouse either to the left or the to the right while holding the left-click to zoom in or to zoom out of the timeline. The Zoom to Fit the Timeline icon is located in the upper right corner of the timeline. Clicking on this icon will enable you to see all the media you've added to the timeline within a screen.

Wondershare filmora render timeline huntergulu
Render Video Di Filmora 9 Agar Video Hasil Render Berkualitas HD. Cara ini bukan hanya membuat kualitas video hasil render bagus, namun juga membuat video hasil render memiliki ukuran yang lebih kecil. Frame Rate =>60 Fps ( Seusuaikan Dengan Video Asli ) - Jika anda tidak tahu Fps video asli, maka pilih saja 60 Fps.
Wondershare Filmora 9 review Easy to use affordable video editor
As you hover over the area of the timeline that shows time with your mouse, the pointer is going to change into a two-way arrow. Move the mouse either to the left or the to the right while holding the left-click to zoom in or to zoom out of the timeline. The Zoom to Fit the Timeline icon is located in the upper right corner of the timeline.
Cara render timeline di filmora Download Wondershare Filmora 9.1.1. 20190418
So head towards the Filmora title in the top left corner of the main screen, click on it and choose preferences from the list as shown in steps 1 and 2 in the picture. After that go to the save menu from the preferences tab as can be seen in the picture. You will the option of "time for auto backup" as shown.

How to Render Video in Filmora UnBrick.ID
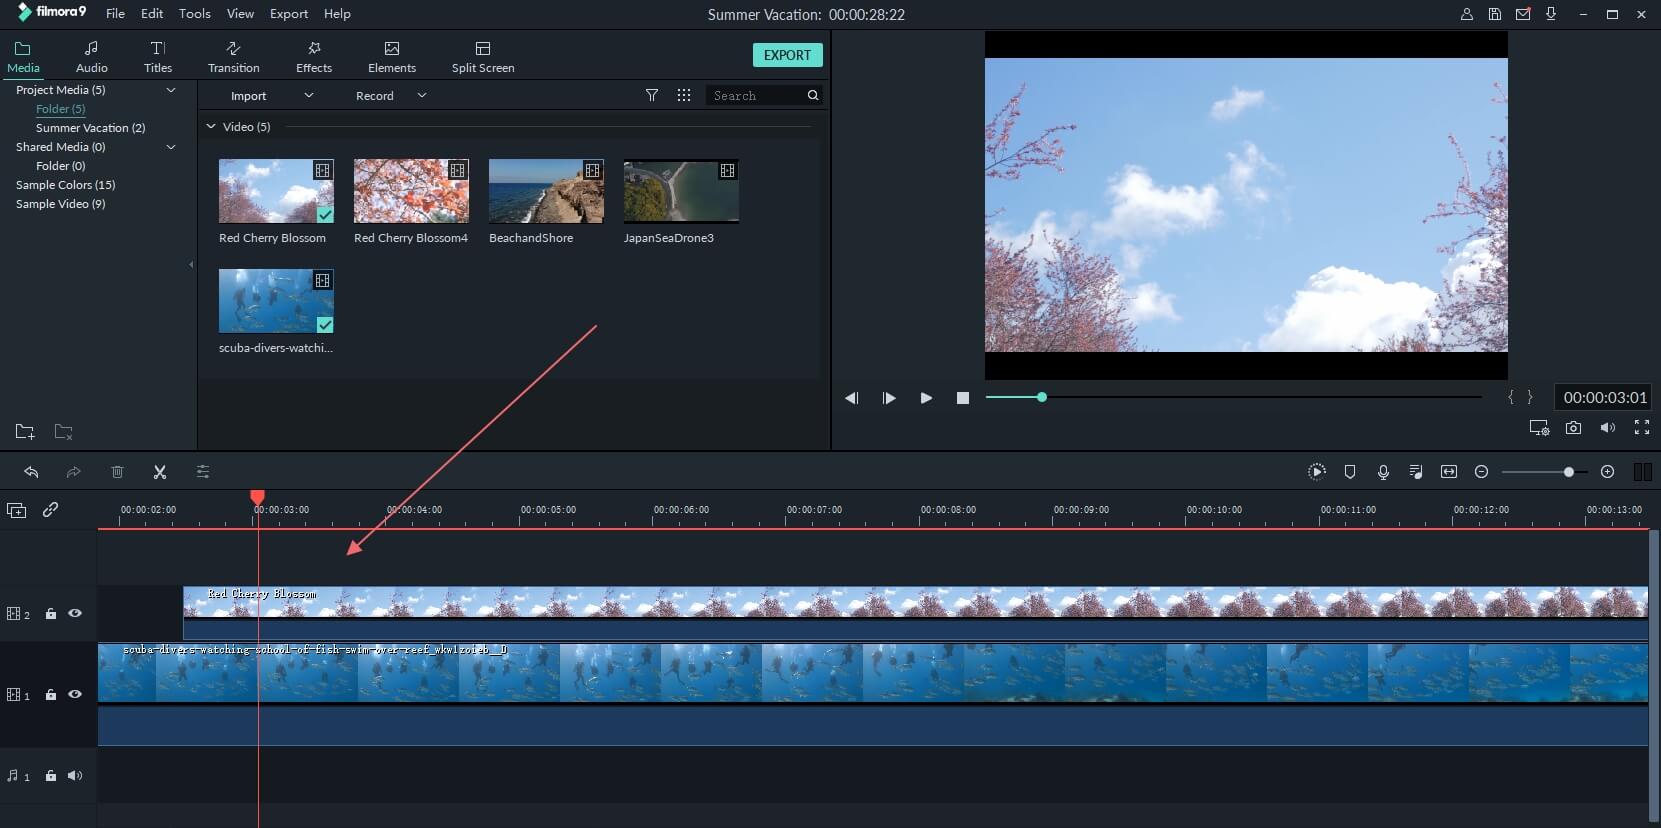
Press the I key on your keyboard to set the In point, then drag the playhead to the location on the timeline where you want to set the Out point and press the O key. Alternatively, you can use the In and Out buttons in the Viewer Panel to define the work area. Pressing the P key on your keyboard will make the size of the work area equal to the.
Cara Render Video Di Filmora 9 Agar Kualitas Video Bagus
In this tutorial, I will show you 2 ways to export a part of the timeline in Filmora 9.My main video editing software is Filmora 9. It is an easy to use vide.

Solved!! Render Timeline Filmora 9 YouTube
The latest release of Filmora version 9 also misses out the storyboard mode. It feels odd since storyboard mode is useful in making quick projects. Even without it, everyone can learn to use Wondershare Filmora9. The interface and workflow are easier compared to other video editing programs in the market.