
Cute Frog Corner Bookmark DIY ideas for kids Bookmarks kids, Corner bookmarks, Crochet bookmarks
73 Cool Homemade DIY Bookmark Design Ideas for Reading Enthusiasts by Sudarshan Kar Updated on March 28, 2023 Ask any person who loves to read how they would feel if someone returns a book they borrowed with folds like dog ears in page corners. Horrible!

Easy Corner Bookmark Ideas Corner bookmarks, Bookmarks, Crafts
Fold the lower right corner up to meet the top right angled corner. Repeat for the left side. Fold these two back open. Flip down ONE of the top sheets and crease. Final steps of the Origami Bookmark Corner. Now fold the flaps you created back up and tuck INTO your bookmark. Repeat for the other side. Congratulations, you have just created your.
Corner Bookmarks Designs How make Origami Bookmark Corners
Take the right corner and fold it half-way inside the triangle. Be sure the tip of the triangle is flush inside the pocket. Repeat with the other corner. Your easy origami corner bookmark is now ready to be used! Or you can even decorate it with stickers or stamps or even draw a face on it or a word of encouragement.

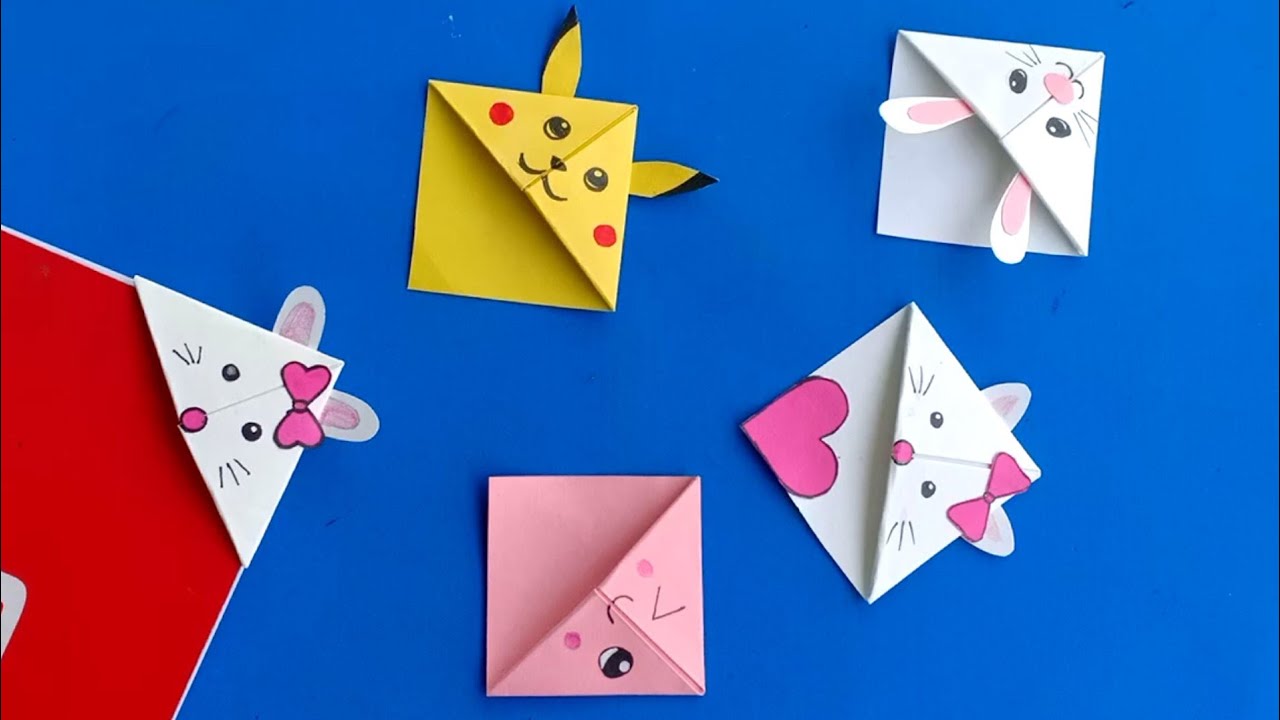
Cute animal corner bookmark fun activity for kids, cute gift idea Bookmarks kids, Origami
Origami is the art of folding paper. I thought I'd take a little break from sewing to share with you this Easy Origami Corner Bookmark craft. As you probably know, I love to make handmade gifts for my family - especially at Christmas. I also really enjoyed crafting with my kids when they were young and my grandchildren now.

71+ cute origami corner bookmark coloring pages SailorMukta
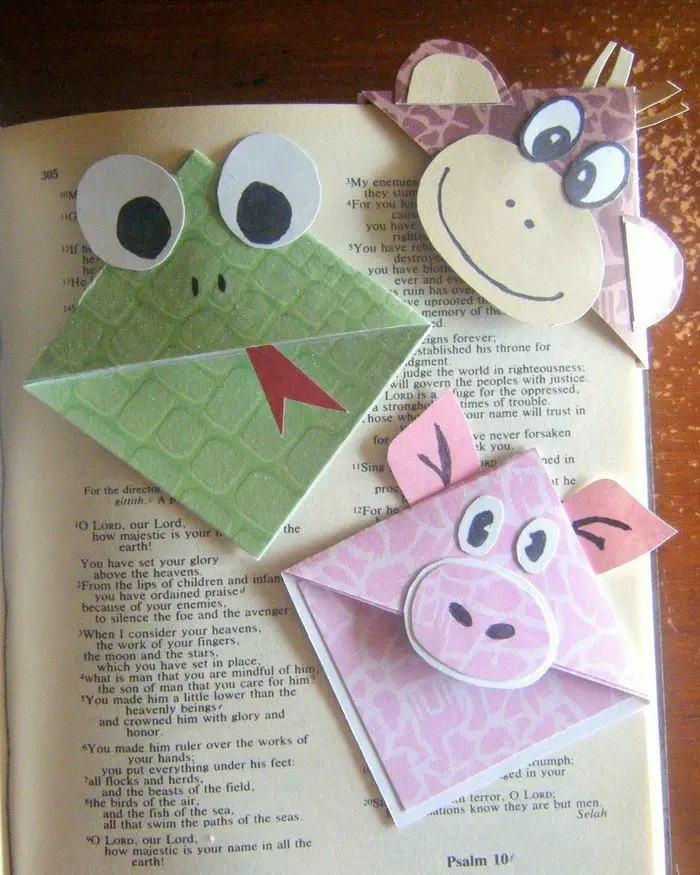
Now lets turn this corner bookmark into a cow corner bookmark. Draw spots with a black marker (or a brown one if you fancy brown and white cows more). Cut a snout out of pink paper. Draw nostrils. Glue the snout on the bookmark. Draw eyes or stick on two wiggle eye stickers. Cut horns out of beige paper and glue them on the bookmark.
Adorable Customized Corner Bookmarks 4 Easy Steps Craft projects for every fan!
Step 1 Cut out the template as shown below. Step 2 Trace the template design onto the coloring page and cut out the bookmark shape. Step 3 Fold where appropriate and glue the two flaps to each other leaving a pocket for your book page. That's it!
DIY Easy Origami Corner Bookmark
Fold the bottom corner up to meet the top corner. Bring the bottom corner that's closest to you up onto the top corner, folding the paper in half. Crease the fold firmly. Make sure the corners are perfectly lined up before you crease the paper. 3. Fold the sides up to the top to make a small diamond, then unfold them.

Corner Bookmarks Crafts, Corner bookmarks, Bookmarks
Step 1: Start with a 6" square of paper. Flip it over so the back side faces up, and rotate it 45 degrees like a diamond. Fold the paper in half by taking the bottom point and bringing it up to meet the top point. Step 2: Take the right point and bring it up to meet the top point, and fold.
30 DIY Bookmark Ideas To Liven Up Your Reading
Enjoy up to 90% off only today. Best deals in Australia. Worry-free post-sales guarantee! Discover unbeatable deals and discounts on the Temu App. Download Now & Save Big!
DIY Kawaii BOOKMARKS //Easy Origami Bookmark Corner How to make a Corner Bookmark DIY YouTube
What is Origami Paper folding is a relaxing and fun craft. It's a simple process that doesn't require any glue or special machines and can produce beautiful works of art. These corner bookmarks are a simple way to get started with origami. Origami simply means the art of paper folding.
DIY Page Corner Bookmarks Youth Are Awesome
Cut out your corner bookmark. Use a paper scoring tool or just fold your cardboard where the template shows you, so you end up with a square. Paint or Mod-Podge some paper onto the back side of the middle of your pattern so that you have a two-sided square. Fold up your bookmark. Hot glue the two back pieces together.
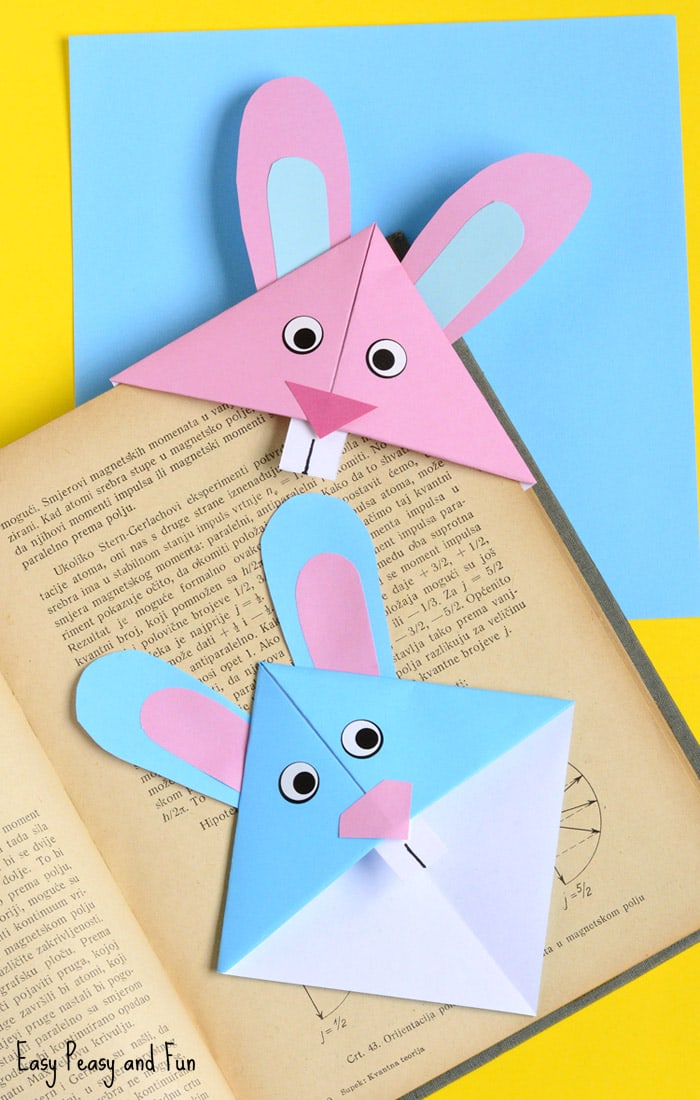
Easter Bunny Corner Bookmark DIY Origami for Kids Easy Peasy and Fun
Method 1 Making an Origami Corner Bookmark Download Article 1 Get some 6 by 6-inch origami paper. Origami paper is the best but if you don't have any origami paper, cut a 6 by 6-inch (15.24 by 15.24 centimeters) square out of thin paper, such as gift wrap, printer paper, or construction paper.

How to Make Corner Bookmarks + Ideas and Designs Easy Peasy and Fun
1. Start with a square sheet of paper. If your paper is rectangular, fold one corner diagonally to the opposite edge and trim off the excess paper to form a square. 2. Fold the paper diagonally in half to form a triangle. Make sure the edges align neatly, and make a firm crease along the folded edge. 3.

Corner Bookmarks Bookmarks handmade, Scrapbook paper crafts, Creative bookmarks
Step 1 - Prepare the Pieces Cut the three fabric squares and one piece from interfacing or low-loft fusible fleece. I used Vilene H630 fusible fleece. Fuse it to the back of one fabric piece. Fold and press one fabric piece with WRONG sides together so as to form a triangle.
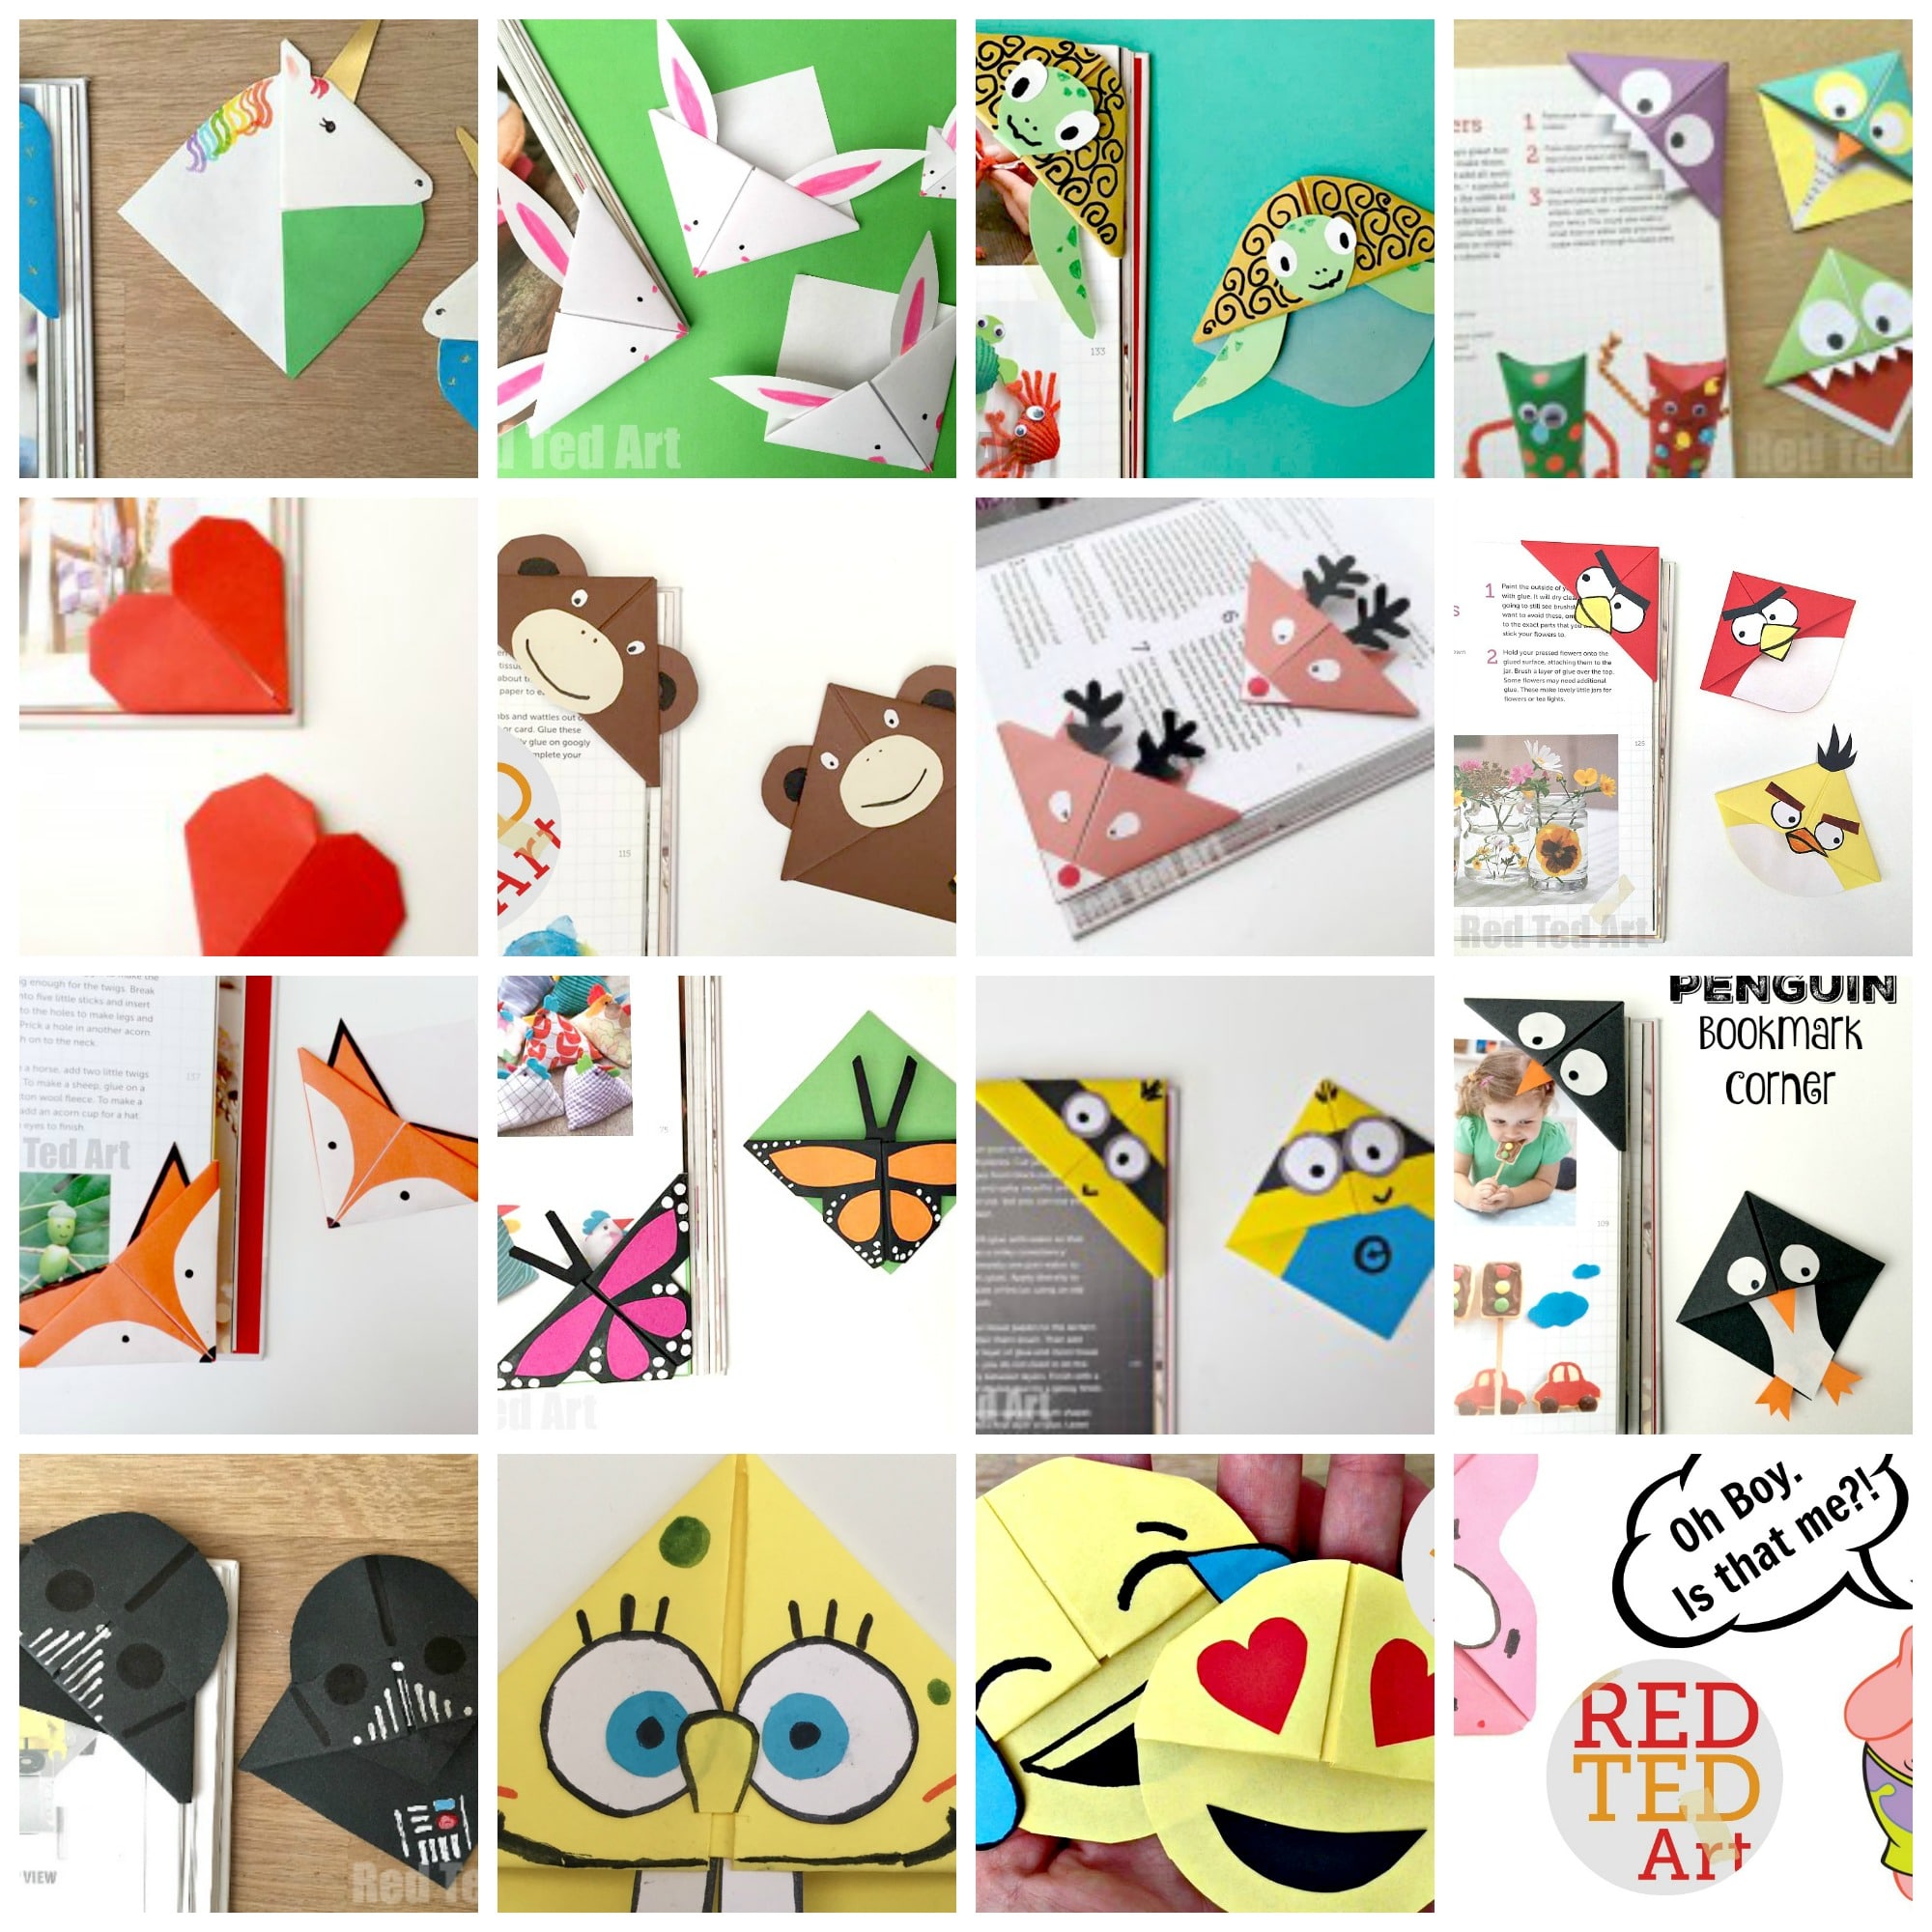
30+ DIYs and Ideas to Make Corner Bookmarks Guide Patterns
Spread the love Grab your paper it's time to make some cute and fun DIY corner bookmarks. Learn how to make easy bookmarks with the video tutorials and step by step instructions. So many different homemade corner bookmark ideas. Great DIY project for kids, teens and tweens.

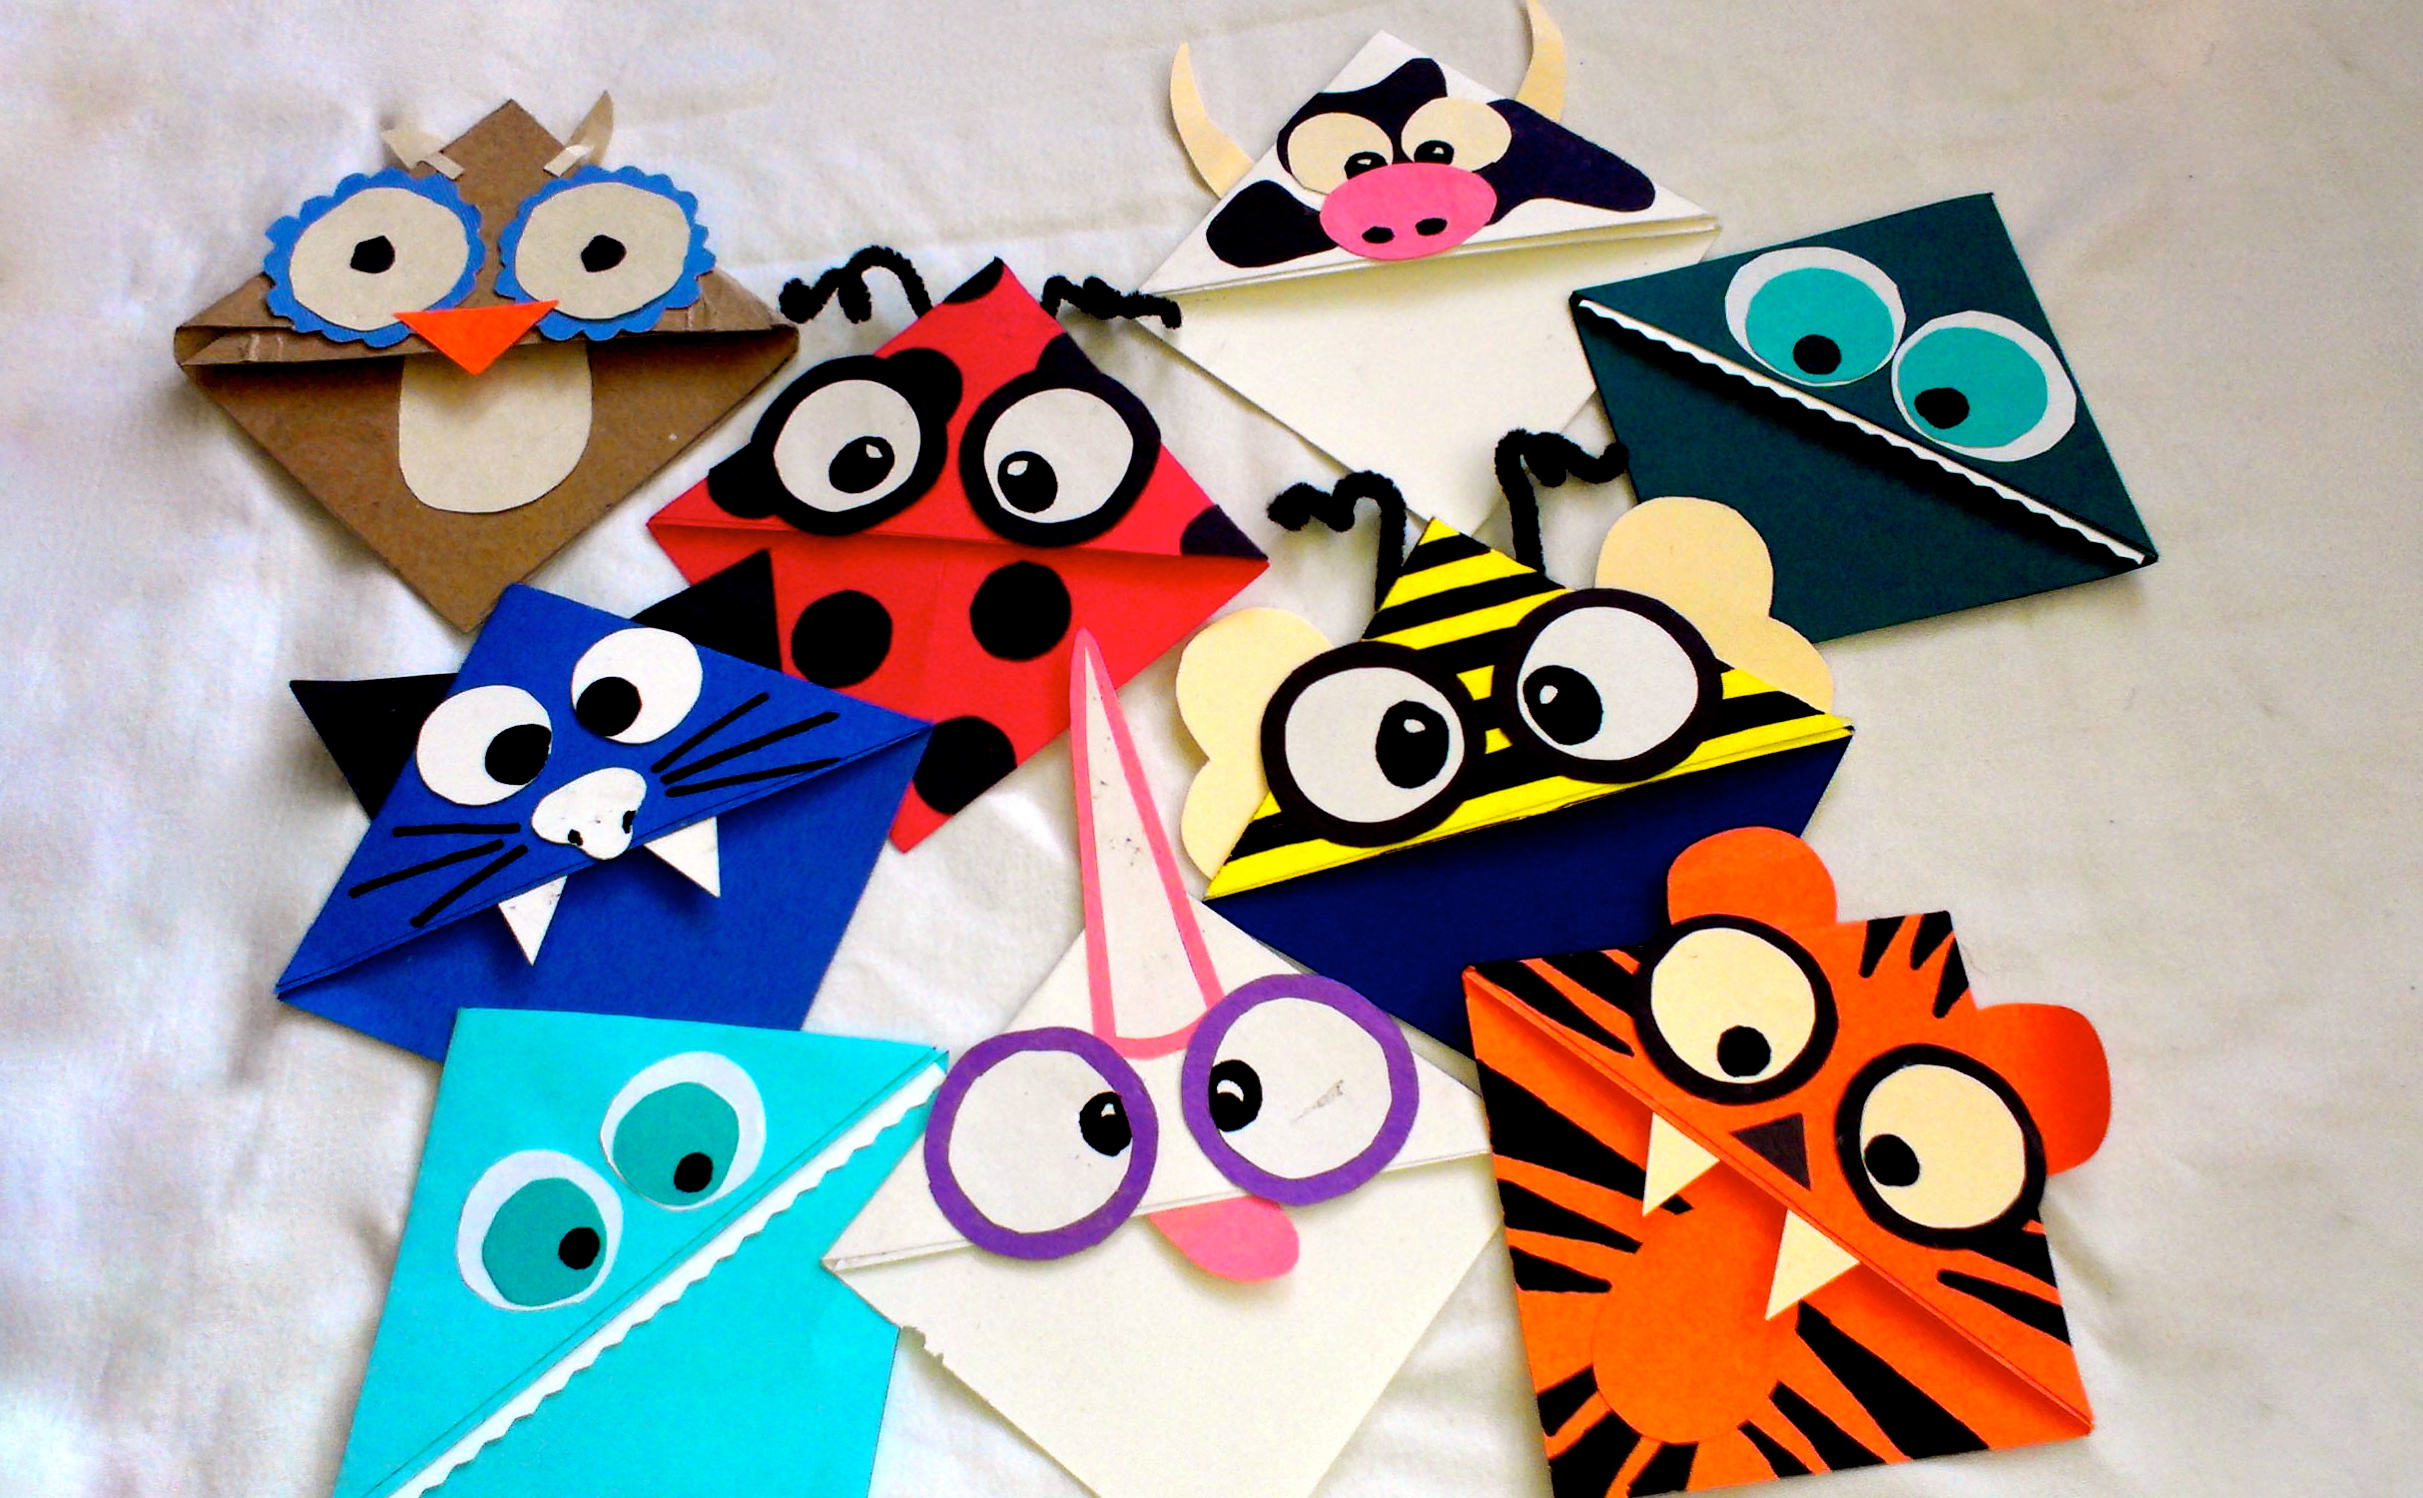
Little Critter Corner Bookmarks Paper Town
Wonder Women Inspired Corner Bookmark: https://youtu.be/o05dr2X2_RwMinnie Mouse and Mickey Mouse Bookmark: https://youtu.be/PcbiHzkwJfMPanda Bookmark: https:.